Categories
Uncategorized

My Experience of Driving Nexon EV Max for 10,000 km

I wrote about my first long-distance EV road trip back in November 2022. It was a unique experience filled with excitement and anxiety. It made me think hard about the existing challenges in owning and driving an electric vehicle over long distances.

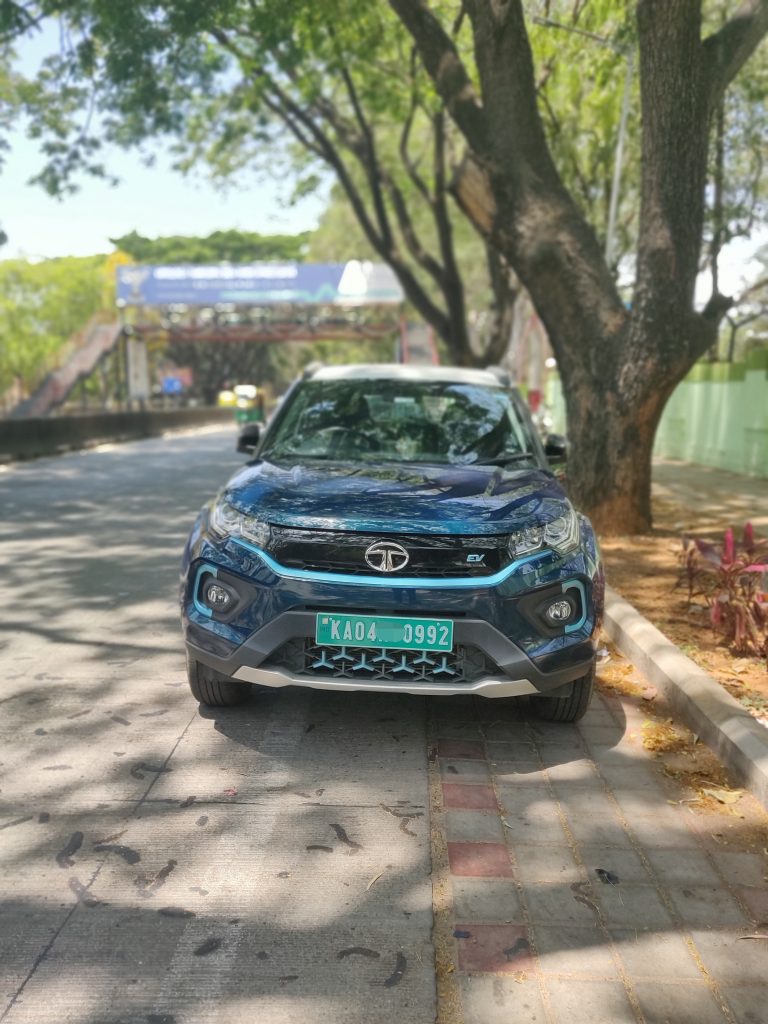
I have now driven my EV for a total of 10,000 km within the state of Maharashtra, a combination of city drives and out-of-station drives. I have even made multiple trips on the same route I wrote about for the first time.

The vehicle has completed two servings, the first at 1,500 km and the second at 7,500 km. Both were free services; the first did not cost anything, and the second cost Rs. 1,800 for a transmission oil change.

So here I am, writing about my experience to help you better understand the ecosystem and make a more informed decision about buying and driving an electric vehicle.

Nexon EV Max

Driving Experience:

When someone wants to know about an EV, they start by asking about the cost of driving and the time required to charge the vehicle. These are undoubtedly essential questions, and I will answer them. But, the driving experience is more important to address first.

Driving an electric vehicle is unlike any Internal Combustion Engine (ICE) vehicle; there is no gear and thus no clutch pedal—only two pedals for the driver, one to accelerate and the other for the brakes. Usually, the driver uses both these pedals with the right leg. Since all-electric vehicles are automatic by design, the left hand and left leg are free while driving, reducing stress levels and providing a comforting experience. Yes, this is not an EV-specific feature; the same is true for automatic ICE vehicles.

The two key features of EVs are the silent and no-vibration drives. The vehicle makes no noise outside and in the cabin. No engine also translates to zero vibrations. Engine vibrations are the main contributor to the fatigue experienced on long-distance trips. The absence of it makes the EV drive experience very relaxing. It may sound like a minor thing to consider, but trust me, once you drive an electric, this is one of the things that you will appreciate the most.

Finally, different driving modes and efficiency features make driving electric even more fun. One can choose between Eco, City, and Sports modes in Nexon Max. Most other EVs have similar driving modes. As soon as one hits the accelerator pedal, the instant torque makes for zippy driving and provides more control over how you manoeuvre your vehicle on city roads and highways.

On the other hand, regenerative braking allows you to slow down the vehicle by releasing the accelerator pedal, thus enabling single-pedal drives. Remember, this helps one recoup energy back into the battery, enhancing range. Multiple levels of regenerative braking allow how fast or slow you want the vehicle to reduce speed and, thus, how much energy you want to regain.

My experience driving an EV has been fantastic, and I enjoy silent and no-vibration drives. I rarely change the driving modes and regen levels. I use City mode for most of my city driving and prefer Eco mode when I go on highways to be more efficient.

Odometer at 10,100 km – Nexon EV Max

Charging Experience:

Let me address the burning questions about charging times and costs. Yes, you need to plan your travel ahead of time and keep your vehicle charged accordingly. It is more challenging than taking an ICE vehicle on an impromptu drive. You can find fuel stations almost everywhere, but EV chargers have yet to be widely available.

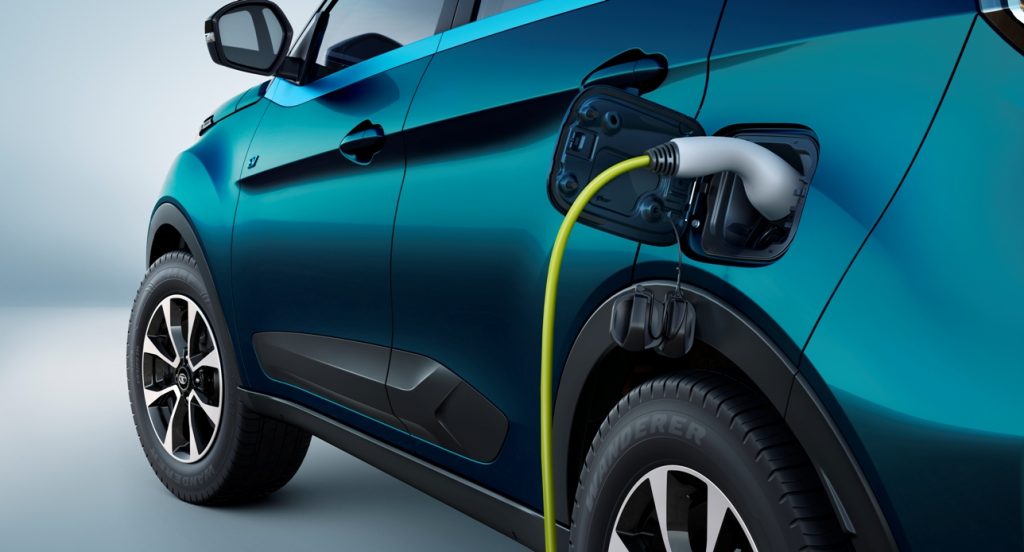
It takes 16 hours to charge the battery from 0 to 100% on a regular 16A outlet, which is commonly available in every house. On the other hand, at a public fast charging station, the vehicle will take anywhere between 1.5 to 2.5 hours, depending on the power output of that particular charger.

Now for the cost, the Nexon Max battery is 40kWh, meaning it takes 40 units of energy for a full charge. The cost of that energy per unit depends on the type of charger you are using.

If you use a regular home charger or a slow charger, the energy cost per unit will be as per the charges of your home electricity provider. For me, the energy provider is Maharashtra State Electricity Distribution Company Limited, and the cost per unit ranges between Rs. 8-12, depending on the overall energy usage. If the average price is Rs. 10 per unit, it will be Rs. 400 to charge the vehicle fully.

On public DC fast chargers, the cost varies between Rs. 18 to 24 depending on the company providing the charging service and also the power output of the charger. So an average price of Rs. 20 will enable a full charge in Rs. 800.

I charge my vehicle 80% of the time with a regular home charger, usually twice a week. I rarely charge on a public DC fast charger in the city, simply because there is no need. Whenever the battery reduces to 10-20%, I plug the vehicle for 12 hours overnight. The other 20% is fast charging whenever I travel outside the city.

At 30kW DC Fast Charger by Charge Zone- Ahmednagar, Maharashtra

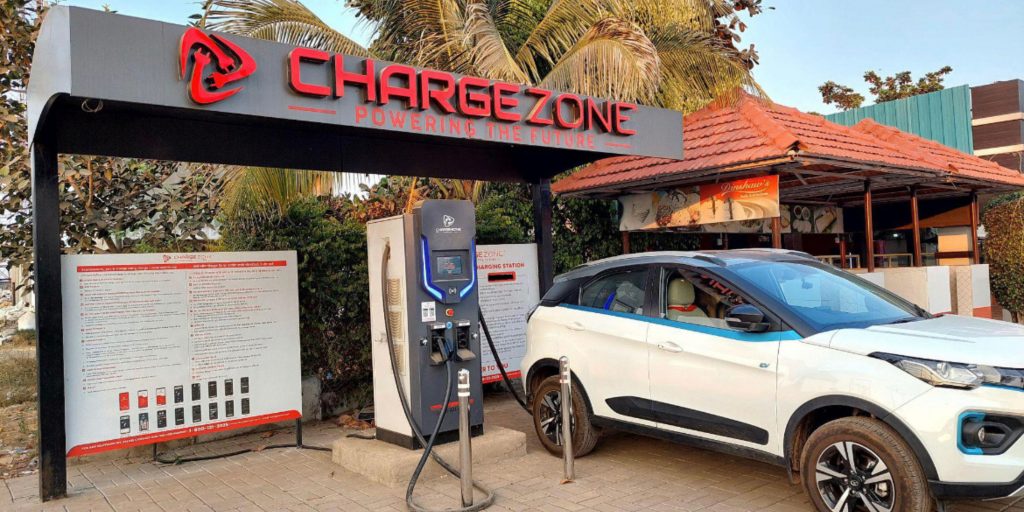
Charging experience on DC fast chargers is excellent, but only sometimes. There are quite a few fundamental challenges that need to be addressed by Charge Point Operators (CPOs). I faced some common issues: wrong location on the mobile app, no power at the charging station, connection failure, only one or two points operational out of multiple shown on the app, no waiting area, etc.

Although I’m convinced that almost all modes of transport will use electricity in the future, a lot of work needs to be done. It starts from creating all different vehicle types to address the market needs and goes into building a reliable and efficient charging infrastructure which results in a smooth user experience.

I have used chargers by CPOs such as Bolt, Tata Power, Charge Zone, Jio BP Pulse, EV Pump, RechargeEV, Kurrent Charge, goEgo, and ChargeGrid. The best experience in terms of ease of use and no unexpected failures has been Charge Zone. The most unreliable has been Tata Power, but they have the largest network of chargers across India.

So it’s a work in progress, going in a good direction and with speed. For example, when I wrote about my first long-distance EV trip, I had no charger between Aurangabad to Amravati, almost 350 km. But now there are two active chargers by EV Pump on the same route, one at Jalna and the other at Mehkar, which made my journey anxiety free.

The Range:

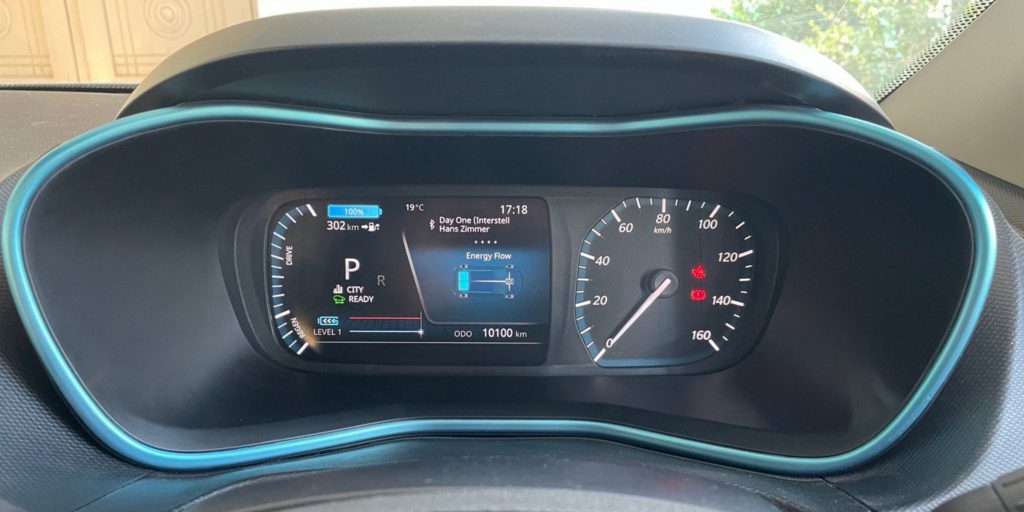
Even though the company claims that the Nexon EV Max range is 437 km on a full charge, it is almost impossible to get that range in everyday usage. You will have to drive in Eco mode, alone, with no luggage and AC off, to get anywhere close to that number.

The range depends on multiple factors, such as your driving mode, how accelerator and brake pedals are used, regenerative braking, city or highway drive, the load in the vehicle, and AC usage.

In my experience, the city range is 300 km when you are driving alone or with one more person, with minimal luggage and AC on at all times. It comes down to 250 when you are on a highway with the same conditions and goes further down if the vehicle is fully loaded with four passengers and luggage. This is under the assumption that you will be driving close to 100 km/h on a highway.

At 60kW DC Fast Charger by EV Pump – Aurangabad, Maharashtra

Conclusion:

My overall review is positive, ⅘ if you may. The silent and no-vibration drive experience is like nothing else; the per km cost of driving is ⅕ of the ICE vehicles in most cases. The charging infrastructure is spreading rapidly, but the reliability of available chargers needs to be enhanced.

Consider an EV as your next vehicle and help contribute to moving towards a more sustainable energy future. Do share this with someone who will benefit, and reach out if you have any specific questions; I would be happy to help in any way I can.

Categories
Uncategorized

Nexon EV – Some useful posts – Review, Journeys and Tips

I am sharing some experiences which I saw on Facebook. I hope these will help those who are planning to take Nexon EV and may help those who already own Nexon EV. These posts are easily available in Facebook with #svXPs hashtag. Now consolidated links are available as two posts. This owner covered around 50,000 kms in 14 months.

EV Journey details

Some journey experiences are shared in this link. Those who are interested in checking the average range of the vehicle as well as the usability of the vehicle for long drives can go through this post.

EV suggestions, tips and review details

The suggestions, tips and review of the owner is shared in this link. This includes

This post also covers the review of the vehicle. Those who are interested in buying a new EV (Not just Nexon EV) should go though the review post 3 to 6.

In the post which mentions about the issues found in Nexon EV, one link is provided which consolidates the problems experienced by various owners in a spreadsheet. It also provides some suggestions, future requests as well as some tips for new owners also.

Screenshot of above said spreadsheet
Screenshot of above said spreadsheet.

There are a lot of other owners who share their experiences in the following links. I hope those too will help Nexon EV Owners. Please note I haven’t gone through all these contents.

Categories
Uncategorized

The Aha EV Travel Kit Saga

The story of this product also has its roots in our Jaisalmer trip… we covered 1500 kms in remote Rajasthan roads in the Nexon EV, which taught us everything how to charge the car anywhere we went. The three part series that we did captures the whole story of the evolution of the EV Travel Kit:

Part 1 of the Jaisalmer trip –

Part 2 of the Jaisalmer trip –

Part 3 of the Jaisalmer trip –

The good thing that came out of this trip was, our learnings of how to charge the car at all places, which we condensed into the “EV Travel Kit”, summarized in this video:

The kit has since helped many a traveller. If you wish to order the kit for your own peace of mind while taking your EV to untrodden roads, here is the link:

https://aha3d.in/ev-travel-kit

User Reviews

Charan, who runs the popular YT channel “iguru crazy”, reviewed the EV travel kit on his channel:

For any queries, user feedback etc, ask around from its many users on our Nexon EV PAN India group, or call us at 8003944400!

Categories
Uncategorized

The Aha NexCruise saga

The story actually started in Dec 2020, when we took our Nexon EV to Longewala, Near Jaisalmer, a town on the Indo-Pak border. There is an entire video series we did (watch if you’re interested in the background of this innovation):


So the story continued since our Jaisalmer trip; we realized that to really make the car go far, the “EV style of driving” needs to be adopted. Once you drive the car like that, the car gives much more predictability on range, and suddenly becomes highway worthy.

That said, although we could get great range on highways, but this EV style quickly becomes terribly painful, as I realized during my jaisalmer trip. And not everyone can or will take the pains to do that.

So, what essentially happened was, with my background in electronics and programming, I realized that this “EV style of driving” can actually be automated, and a system can be made which can make the wonderful reliability of range with highway driving accessible to everyone.
Cruise control is the most fundamental piece of puzzle to this reliability. We developed an initial system and posted a video, and got phenomenal response encouragement from the EV community.
Here’s the video:

Further, we did a few more tests and posted videos on the same. We also collected ideas and feedback on what the community really needs.
Turns out everyone wants to take the car on the highway. And they have a clear idea of how they want the car to behave, more or less. It tallies with my own needs too, as an EV user.
Here are few more videos, in sequence of posting:Testing the cruise control system for power consumption on various cruising speeds:

I tried to explain how regen works in simple terms (not sure how successfully, though!):

And here’s when I decided let’s see if people will like to join the effort as early adopters:


We got phenomenal response, and picked ten early adopters of the system. Here’s the video:

Meanwhile, the system was given the name “NexCruise” by the Nexon EV community.


A member from the NexonEV owners community, Mr. Rakesh, drove the NexCruise in my car. Here are his first reactions:

Further, we formed a team with these ten members, named it “NEAT” (NexCruise Early Adopters Team) and took on the mandate of running the system for 21000 kms collectively over the next few weeks. Plus, many aspects of the system behaviour will be specified by the NEAT members. We’re also collecting data on the system’s impact on the highway-worthiness of the Nexon EV.

Here’s when I took NexCruise on an approx 600 kms trip to Kota with my family, to capture more data and observe the reliability. It worked wonderfully well and delivered a comfortable 310+ km range with full load :

TATA Motors have been facing much flak by users because of claiming a range of 312 kms, but most of the owners never getting it. They even got sued by a few users for this, and this led to a very public scene, and imo TATA could have handled it better. The fun part though is, the car is capable of the claimed range! And repeatedly so. From what it looked from where I stand, the real problem was the users’ own driving patterns resulting in lesser range.

What has happened since is, TATA Motors have gone on a backfoot, and stopped claiming in their advertisements, that the Nexon EV can do 312 kms for a single charge. And this is unfortunate. Aha NexCruise can easily automate the driving of the Nexon EV, and take out all the ambiguity. It can help everyone achieve that range.

Two of the ten early adopters got the systems installed in their cars. Mr. Rakesh was one of them. Here’s a video on this:

All the members are going to be regularly posting their notes and views on the Pan India Nexon EV owners Group on telegram. Casual discussions keep happening around the system in this group. Anyone owning a Nexon EV can join and directly interact with the NEAT members, and with me, and can be a part of the product’s evolution.
On Saturday, 7th August, the remaining NEAT members got the NexCruise installed on their cars:

With this, the early adopters round was officially closed. This video summarizes the chapter:

Further, as the next round of product evolution, we processed all the feedback received by the community, and are in the process of defining the next features:

With the NEAT program coming to an end, here is a compilation of all the notes and remarks from the NEAT members on the Aha NexCruise:

And this video speaks about the delivery timelines for the Early adopters. We’re targetting a delivery on or before Diwali 2021, that is, the 4th of November!

This is how far the evolution of NexCruise has come, at the time of this writing. Will update this page soon. Meanwhile, please stay connected via my YT channel – youtube.com/aakashece!

Categories
Uncategorized

New Meter Connection for Nexon EV Charging

This is being posted here for the benefit of all NexonEV (NEV) owners in Maharashtra, especially from Mumbai. It can be equally useful for NEV or any other EV Owner in India, new or existing, who stays in an apartment complex in any city in India.

Background

As per the 2018 Policy of Maharashtra State for EVs & Related Infra, private EV Charging points are being permitted by way of separate domestic supply metered connection to individuals. This fact is seldom advertised by the EV vendors or the Power Distribution Companies (DisComs).

Why Separate Metered Connection

In my case, to apply for a separate metered connection was the only available option due to the following circumstances:

  • I stay in a skyscraper in western Mumbai and my existing domestic supply electricity meter is located on the 23rd floor.
  • I have my own private dedicated & covered parking slot on the 1st floor of the multi-level podium parking in the building.
  • Tata Power Co. Ltd. (TPCL) executives who install the charging point strongly advised against pulling the cable from my existing meter due to the length involved (approx. 150mtrs). The length also meant using a higher gauged cable (4mm2 or 6mm2) if inevitable.
  • My Society refused the permission to me to pull the wire from the Electrical Shaft as it is already nearly fully occupied, and they wished to keep it open for future common amenities like JIO Fiber.

Why Adani Electricity Mumbai Ltd.

  • As per the present rules, every new connection must be done by the DisCom which has a sub-station installed in the vicinity.
  • TPCL has not yet installed sub-stations in all parts of the city. They cater to the South Mumbai areas primarily and have installed sub-stations in very few locations in the Greater Mumbai region.
  • As per my detailed tariff comparison, TPCL is cost-effective only if the consumption exceeds 300 units per month. For any consumption below 300 units, AEML is much cheaper. The lower the consumption, the cheaper is AEML.
  • If so required, one can always shift to TPCL later on.

Documents Required

Since most of us usually buy apartments in buildings or already built houses, we seldom know the process for the installation of the domestic electricity meter.

So, for the benefit of readers, I explain below the detailed process for a new domestic connection.

The List of Documents & other requisites are:

  • A NO OBJECTION CERTIFICATE from the Builder/Developer/RWA/Co-Op. Housing Soc.
  • A TEST REPORT from a Licensed Electrical Contractor. This will exactly define where the meter will be actually installed.
  • KYC documents & passport size photograph of the Applicant.
  • Proof of Ownership documents (Regd. Agreement/Property Tax or Water Bill/Gas Bill/Share Certificate of the CHS/Latest Maintenance Bill)
  • Existing Electricity Bill as we are applying an additional connection. (NOTE: In case the connection is still in the name of the Builder/Developer, an NOC from the same Builder/Developer will be required compulsorily)
  • Blind Trust on the Contractor.
  • God-like patience to wait for the things to move on the ground.
  • In case inevitable, the willingness to email to the authorities, tweet to the official handles & comment on the Facebook pages.

The Application Form needs to be filled offline and online, both, in case of AEML. All documents, including the form, should be self-attested/signed at the designated places, scanned and then uploaded at the time of applying online. Post online application, the entire set of documents are required to be physically submitted at the AEML office as well.

Application

1. Physical Application Form
  • Prepare the physical application form (PDF available on Adani Electricity portal or collect from any of the AEML offices; Bill Collection centers do not have these forms, but no harm trying your luck).
  • In the form, ensure to mention the email id & mobile number correctly.
  • In the “Address” column, please state as “Parking No. <parking slot number> of <your apartment number>” followed by the Building Name, Address etc.
  • State your existing AEML account & meter numbers.
  • In the “Purpose/Type of Supply” column, select “RESIDENTIAL” only. DO NOT SELECT “EV CHARGING STATION”. The application will be rejected upfront as this is meant for Common/Public Charging points only.
  • In the “Load Demand” column, enter the desired load for “New Load“. I opted for 5kw. NEV needs 3kw load as a minimum. My contractor advised for a 5kw as the charges are same for new meters upto 7kw. If we select a higher load (load > 4kw), we get a better capacity jumper cable to the meter which makes it cheaper to increase the load in future if ever required. Leave the HP column blank. Anything above 7kw will also mean 3-phase supply, which is not required.
  • In the “Type of Meter” column, select SINGLE PHASE meter. NEV can be charged on single phase as advised by TPCL. Plus, the cost for 3 phase connection, meter size and hence meter box size will all increase as well.
2. KYC Documents
  • Prepare all the KYC documents, self-attest them in blue ink and sign at the designated places on the form in blue ink. Remember to sign across the photograph on the form.
  • Obtain the Test Report Certificate from the Contractor with his official stamp & sign. It will also have his credentials to be mentioned in the form.
  • All the KYC documents, NOC, Test Report & the completed AEML form (all pages) need to be scanned for uploading on the AEML portal.
3. Online Application
  • Register on the Adani Electricity portal for the online application using your desired mobile number & email address.
  • Fill the online application form with the same/corresponding details in the physical form.
  • In case “Load Demand” (in HP) is mandatory, state “0” (zero) as we do not have any motor running on the meter.
  • Upload the scanned copies of all documents, photograph, AEML form and submit.
4. Application Processing
  • After submitting the online form on AEML portal, you will immediately get an Application Ref. No. (ARN) starting with letter “T”. This is useful only till the time the application is finally approved by the AEML officers.
  • Submit the physical form along with the entire set of KYC, NOC & other documents at the nearest AEML office. The bill collection centers do not accept new connection forms. Do remember to state the ARN on the face of each document being submitted.
  • Once the ARN is approved, what you get is the final Customer Account Number which clearly assures us that a new account is opened for the meter. The timeline is about 02 working days after submitting documents online.
  • Till this time, the Licensed Contractor kept his Test Report blank and submitted with AEML.

Installation

1. Meter Box
  • If there is no space in the Common Meter Room / Cabinets, we will need to fix a separate Meter Box for installing the Meter. In my case, the Committee decided against giving me space in the Common Meter Cabinets.
  • This Meter Box is fabricated using fire-retardant plywood with acrylic sheet fixed in an aluminum frame for the door. Try to use clear acrylic to enable reading the Meter regularly without opening the Box. The door is lockable & has a latch. The box has ample ventilation and holes for the cables.
  • Advisable dimension of the Box for a Single Phase Meter is 18″ x 16″ x 9″ (Height x Width x Depth). It can be more compact depending on the space available to install the Box.
  • The Meter Box was installed by the Contractor and he fixed an MCB inside the box. We will be connecting the cable for the Charging Point from this MCB. Preferably insist on fitting a high quality MCB (LeGrand / Siemens or equivalent make).
  • After installation, the Contractor updated his Test Report. AEML commenced the connection & installation process only after the Test Report was finalized.
2. Board Wiring
  • An AEML ground executive from my Contractor’s network did the Board Wiring.
  • He fixed some wires in a set pattern and connected one end to the MCB installed in the Box and left the other end lose.
  • This executive uploaded a few pictures of the completed Board Wiring completed in AEML app. Only then, the AEML engineers certify it and direct another team to connect the Jumper Cable.
  • In ideal circumstances, the steps upto Board Wiring can be completed in 6-8 working days. In my case, it took a full 3 months. Partly due to Covid, partly due to resistance in AEML for reasons which I have explained in the end of this blog.
3. Payment for Installation
  • Once the Board Wiring as per the pictures is approved by AEML officers, we receive a link to make the payment for installation.
  • The timeline for this link to be emailed to us is usually 2-3 working days after the Board Wiring.
  • We can pay the same online (through Cards/NEFT/UPI/Wallets etc.) or simply pay cash to the Contractor.
4. Cancellation of Application!
  • AEML being an electric company, loves to shock its customers.
  • Once you make the Payment for Installation, AEML shockingly sends across an email & SMS stating that the “Application is Cancelled“.
  • This happens in about 3-4 working days after the Payment is done.
  • The Contractor explained to me that this, in fact, means that the application is cancelled from the back office and handed over to the ground staff to execute.
5. Jumper Cable Connection
  • This is the most critical of all tasks for any new electricity meter connection.
  • AEML ground staff (a team of 2-3 persons headed by a “Joinder”) finally makes actual connection from the Main Supply Cable to the meter box.
  • They fix a “Jumper Cable” and clip it firmly to reach inside the Meter Box.
  • Timeline is about 2-3 working days post “Cancellation of Application”.
  • Every team of Joinder seeks money here and gives flimsy reasons for extracting money.
  • At this stage, it is incredibly important to trust your Contractor and be immensely patient.
  • Let the Joinder go back if they say so. The contractor will manage the show.
  • Further, at this stage, more than the contractor, the AEML officers are worried as they internally have to report the status of our connection daily and hence, they too will ensure it happens quickly.
6. Meter Finally!
  • The actual Meter is installed within 1-2 days after the Jumper Cable Connection. This too is completed by AEML ground executives.
  • They will connect the Jumper Cable to a Phase MCB & Neutral/Cut-out MCB. They will also connect a cable from the Phase & Neutral to the Meter.
  • And finally the Meter is connected to the Board Wiring wires and this connection is sealed.
  • In my case, AEML quite brazenly told me that they are out of Meters, so it took a week for me.
  • Again, just as for Jumper Cable, AEML officers will ensure it happens quickly as they are reporting it daily and the billing must commence for AEML.

Cost for New Metered Connection (as incurred in 2021)

The total cost for me was:

  1. AEML Charges: ₹ 2616/- (Paid online; ₹ 2593 + ePayment Convenience Fee)
  2. Contractor Fee: ₹ 2100/- (Paid voluntarily)
  3. Meter Box: ₹ 3750/- (Included fabrication, transportation, fitting & MCB)
  4. Misc. Ex-Gratia: ₹ 900/- (Under strict advise of the Contractor)
  5. Gross Total: ₹ 9366/-
  • The Licensed Electrical Contractor whom I found, was highly motivated and keen on experiencing the process of separate meter for EV charging. He never quoted to me or asked any money whatsoever. After due enquiry with my maid & office staff, I concluded the industry rate is about ₹ 2500/- per meter. This includes entire follow-up visits to AEML offices, liaising, co-ordinating etc. with AEML officers, ground executives and more. In my case, it also included fitting the Meter Box twice.
  • All 3 teams of AEML ground executives (Board Wiring, Jumper Cable & Meter) will have to be paid a job-wise ex-gratia of ₹ 200/- to ₹ 500/- as advised by the Contractor.

My Timeline

06-Feb-21
  • Filled-up the physical AEML form & scanned the signed documents.
  • Created the AEML Portal login id, applied online, and uploaded the documents & form on the portal.
  • Submitted the AEML form & entire set of documents physically at the nearest AEML office.
08-Feb-21
  • The application was rejected with an option to rectify online.
  • Reasons for Rejection: Wrong Entry in “Load Demand” in HP (it must be 0) and No Parking Slot Number in Address.
  • The corrections were duly made online by me.
09-Feb-21
  • The rectified application was finally approved by AEML Zonal Head.
  • The permanent Customer Account Number was allotted & intimated to me on email.
17-Mar-21
  • Received an email from AEML that I need to intimate a new service location to them as “the concerned authority” has refused them permission to install the meter at the determined location as per the Test Report.
  • A formal letter to that effect was also issued to me. The Contractor collected the same on my behalf and told me to ignore it. He never handed it over to me.
13-Apr-21
  • The Meter Box was installed by the Contractor.
14-Apr-21
  • The Board Wiring was done by AEML executive.
17-Apr-21
  • Paid the Installation charges online.
20-Apr-21
  • AEML acknowledged receiving the Installation Charges by email.
08-May-21
  • First Joinder’s team visited to make the connection.
  • The electrician of our building & estate manager refused to allow connection from the AEML mainline as it would lead to tripping all water pumps of the complex. They requested to shift the connection to a subsidiary connection adjacent to the location stated in the Application.
10-May-21
  • Got the Meter box shifted to the location as determined on 08-May.
  • Board Wiring was intact, so no additional step added thereon.
  • This was done by the Contractor.
11-May-21
  • Second Joinder’s team visited to make the connection.
  • This Joinder told that they have not been allotted the Jumper Cable, Phase/Neutral MCBs, Cable Glands and more such ancillaries.
  • He unwillingly went back. But while leaving told me, he could sell the same to me if I paid him ₹5000/-. I refused & let him go back.
13-May-21
  • A senior AEML officer visited and modified my application to include the Jumper Cable, MCBs, Gland etc. for the next Joinder’s team.
  • This was arranged by the Contractor.
15-May-21
  • Third Joinder’s team visited and finally made the connection from the AEML mainline and fixed the Jumper Cable upto the Meter Box.
22-May-21
  • Another team of AEML visited and finally installed the new Meter & sealed the connection.
UPDATE: February 2022
  • The above timeline seems extended because of the 2nd wave lockdown due to Covid-19 & its related shortages. Also some roadblocks were raised by the office bearers in the erstwhile managing committee at my apartment complex.
  • Ideally, AEML should now be processing the application and installing the meter within about 15-20 days at the maximum. However, to get such a quick turnaround, several things have to align in the right spots.

Major Hurdles Faced

  • Some Committee Members were unwilling to co-operate. This was particularly an obstacle as the objections were raised after issuing the NOC by duly complying with the formal legal process. Subsequently voices were also raised to revoke the issued NOC.
  • There were some serious office politics among the Managing Committee members which were proving to be a major hurdle as well. During this time, the existing Secretary was urgently & unceremoniously replaced by another Member. This new Secretary was an ex-officer of the erstwhile Reliance Energy Ltd (present day AEML).
  • The Estate Management team managing our complex was changed a few months after I applied with AEML. This change made several existing practices void and I had to repeatedly communicate & explain everything to the new Estate Management. This new team had their own set of new objections which were eventually resolved.
  • The newly appointed Estate Manager forced me to shift the Meter Box by about 1.5mtrs and asked AEML to raise a formal request to make the connection explaining the grounds on which I am being allotted a new meter itself.
  • AEML issued a formal email to me requesting a new service location without giving me detailed reasons for the same. On contacting the AEML office, I was merely informed to collect the letter the Zonal Head gave to the Licensed Contractor.
  • The second lockdown of April-May 2021 due to Covid-19 delayed the process with no assurance of any timelines being adhered to.
  • The Second Joinder was hell-bent on extracting money from me as explained in the timeline earlier.

Some Good Souls

  • Finally, when the objections & anxieties of the Managing Committee & the Estate Manager were resolved, everyone ensured the process went ahead smoothly despite the second lockdown for Covid-19.
  • As time passed, the AEML officers themselves became restless and ensured quick installation once the process actually started.
  • The Licensed Contractor definitely helped here a lot in liaising as otherwise it would have been quite difficult to cut the red-tape in AEML office.

Final Words

As you can see, I have tried to explain every step of the process as experienced by me. I have tried to be as objective as possible and tried to cover everything I could recall. Everyone will surely have a different experience.

However, the steps for new Meter Application & Installation will be more or less the same for every person staying in Apartment Complexes or Independent Houses anywhere in India.

If you feel I missed out anything, please feel free to inform me or comment below.

ALL THE BEST for applying a new metered connection for private EV Charging at home.

SAFE & HAPPY MOTORING!

Categories
Uncategorized

TATA Nexon EV XZ+ Ownership Review with Tips and Tricks

In this very first blog of mine, I wish to share my views on the TATA Nexon EV. We have taken the delivery of the vehicle on 25th October 2020, and have clocked 8000 KMs in 5 months. I present my experience with this electric SUV which happens to be an amazing choice for travelling and beyond.

Unique Features

Starting off with a few small and unique features of Nexon (also common to ICE platform) which makes the driving easier and the SUV unique.

  1. Presence of hooks at various locations like boot, B pillars which is a boon for any Indian Customer.
  2. Speed dependent volume (activates in steps after 40-50 kmph) of the infotainment system which takes care of tyre and road noise.
  3. Lane change indicators: By cranking the indicator stick to half only once will blink the indicators for 6 quick times to change lanes on highways.
  4. The tinted IRVM (inside rear view mirror) is beneficial during night drives. On pushing the lever, the high-beams of rear vehicles is dimmed (passive) and vehicles can be seen without strain on eyes.
  5. While maneuvering in very tight roads, the ORVMs (Outside rear view mirrors) can be folded electronically by the push of the mirror adjustment button.

Review

The highly smooth and noise-less environment in the EV makes driving very peaceful. Overtaking and panic braking are very efficient and is highly reliable. Although the vehicle is heavy, it is not the case while maneuvering or accelerating. Though the projector lamps are not very bright, the high beam is very powerful and has an efficient throw of beam.

The 8000 kms that we have driven, the Nexon EV has given us an average range of 260 kms (28600/110) bringing the approximate cost to exactly 1 Re/km considering the price of 8 Rs/kWh of slow charging. 28600 being the effective total capacity of the battery in watt-hour and 110, the consumption in wh/km.

With the latest updates to the softwares of Nexon EV, the car has showed improved efficiency and patterns of cell balancing during slow charge. The infotainment system also has become smooth with the new version and using Google Maps has become easier with Android Auto.

Tips for efficient driving and Maintenance

  1. For very long drives (above 250 kms) on a single charge, always try to maintain one or zero bar eco acceleration. This bar is shown as green line on the left side of MID (multi-information display).
  2. The tyre pressure must be kept between 34-36 for maximum range.
  3. The max speed should not exceed 80 kmph and should be 70 kmph or less throughout. More the number of speed changes, more is the battery consumption.
  4. The usage of AC has an effect on the battery. This effect is more if the difference in ambient temperatures inside and outside the car is more. The compressor has to exchange more heat to bring about the temperature change. Hence, if AC is to be used efficiently keep the temperatures very near to the OAT (Outside air temperature). On an average the temperature range of 24-26 degree Celsius would be ambient without excessive cooling.
  5. Anticipating bumps and obstacles on road is recommended. This has to be done only if the traffic movement is smooth and is not at the cost of SAFETY. On an average 100 – 200 meters ( > 300 meters for speeds more than 60-70) of regeneration can be utilized while good anticipation of obstacles and bumps.
  6. As a precautionary measure we have never washed the car by drenching it in water. Only wet and dry wipe alternatively has been done (micro-fiber) to prevent any unwanted or unknowing problems to the EV that can be caused due to moisture logging. Adding to it is the ceramic coating which has been done on the car and this type of wash is beneficial for the paint and the coat.

Driving and General Tips

  1. Do not turn the steering while the brakes are applied and the car is at halt, this causes more wear and tear to brakes as well as tyres.
  2. While at signal, hand-brake can be safely engaged in D mode without causing any issues. But be sure not to accelerate (with hand-brake engaged) as D mode is active and may skid the front tyres.
  3. For very steep climbs or inclined road starts, either of the following can be done to prevent roll-back of car: i) Cross the right leg to toe the accelerator pedal and heel to lift off the brakes. ii) Use sports mode and and switch right leg from brake to accelerator very quickly (< 0.3 seconds), this might roll the car maximum by a few inches and is an efficient way.
  4. Always charge the car to 100 % while slow charging as recommended in the manual, as balancing of cells happen and BMS is calibrated correctly.
  5. Do no use the pre-cooling feature excessively as it may drain the auxiliary battery quickly.

Optional Items to be kept in EV

20 Meter extension box with energy meter.
  1. An extension box with sufficient length made of high quality wires (4 sq-mm cross section). A grounding circuit is also recommended as many village locations may not have a grounded circuit and this may prevent the car from charging.
  2. Multimeter to check auxiliary battery voltage, and to check continuity, current, voltage of various circuits for charging.
  3. Tyre inflator.
  4. A 12V DC charger/ jumpstart unit to top-up the auxiliary battery if it goes dead.

In my next post I will share the mileage and trips information in detail along with many other topics.

Categories
Uncategorized

Vivek’s Onwership Blog

Latest…..

Citroen E c3 vs. Tiago EV – User review

Exclusive Tiago.ev Launch

Tiago EV Ownership Review – Motorbyte
Exclusive Tiago.EV launch day interview with PlugInIndia
MotorByte MG ZS EV & Tata NexonEV comparison owner swap video 1
MotorByte MG ZS EV & Tata NexonEV comparison owner swap video 2

Review by Motoroctane

Onwership blog at 1000 km : https://www.pluginindia.com/blogs/tata-nexon-ev-ownership-blog-new-delhi

WordPress Cookie Notice by Real Cookie Banner